Dask Gateway at Purdue AF
Dask Gateway is a service that allows users to manage Dask clusters in a multi-tenant environment such as the Purdue Analysis Facility. Its workers run as pods on the Purdue Geddes cluster.
Limits
| Limit | Value |
|---|---|
| Active clusters per user | 1 |
| Cluster size | up to 1000 workers; 1000 cores and 6000 GiB of memory in total, scheduler included |
| Guaranteed workers | the first of a cluster, up to 100 workers, 100 cores or 600 GiB of memory, whichever comes first |
| Cores per worker | up to 64 |
| Memory per worker | up to 64 GiB |
Workers beyond the guaranteed ones run at low priority. Kubernetes evicts them when a session, a Ray cluster, or another cluster's guaranteed workers, needs their place; Dask reruns their tasks on the remaining workers, and a replacement starts once there is room. They start only while the facility keeps room for new sessions, so a busy facility gives a cluster fewer workers than it asked for; the rest start as room appears.
If cluster creation fails with a message about an existing cluster, shut the old cluster down (or wait for it to finish stopping) first. For most analyses, many small workers (1–4 cores each) work better than a few large ones.
1. Creating Dask Gateway clusters
To create a Dask Gateway cluster, you first connect to the Gateway server via a
Gateway object, and then use the Gateway.new_cluster() method. Every session
is preconfigured with the address of the Purdue AF gateway, so Gateway() needs
no arguments.
While it is possible to create a cluster in a Python script, we recommend that you instead do it from a separate Jupyter Notebook — that way the same cluster can be reused multiple times without restarting.
import os
from dask_gateway import Gateway

gateway = Gateway()

# Path to your VOMS proxy file, on storage the workers can read
# (see "Environment variables" below):
os.environ["X509_USER_PROXY"] = "/work/users/<username>/x509up_u<uid>"

# Create the cluster
cluster = gateway.new_cluster(
    pixi_project="/path/to/pixi/project",  # path to pixi project (directory containing pixi.toml file)
    # conda_env = "/path/to/conda/environment", # path to conda environment - can be used instead of pixi_project
    worker_cores=1,  # cores per worker
    worker_memory=4,  # memory per worker in GiB
    env=dict(os.environ),  # pass environment as a dictionary
)

# If working in a Jupyter Notebook, the following will create a widget
# which can be used to scale the cluster interactively:
cluster
2. Shared environments and storage volumes
Dask workers have the same permissions as the user that creates them, and see only some of the storage volumes of your session — see which volumes the workers mount in Storage volumes. Any environment, code, or data the workers use must live on one of those volumes.
Pixi or Conda environments
A cluster runs the environment you name — it does not inherit the notebook's. The environment must be built before the cluster is created, on a volume the workers mount.
The environment must contain the prometheus_client package, which the
facility's monitoring reads the cluster through, and be readable by all users.
The gateway refuses to create a cluster from any other environment.
The path to a Pixi project is specified in the pixi_project argument of
new_cluster():
cluster = gateway.new_cluster(
    pixi_project="/path/to/pixi/project",  # path to pixi project (directory containing pixi.toml file)
    # ...
)
If you are using a
multi-environment Pixi project,
specify the environment name in the pixi_env argument (default if not
specified):
cluster = gateway.new_cluster(
    pixi_project="/path/to/pixi/project",
    pixi_env="my-env",  # pixi environment name
    # ...
)
If using a Conda environment, specify its location in the conda_env argument
(mutually exclusive with pixi_project and pixi_env):
cluster = gateway.new_cluster(
    conda_env="/path/to/conda/environment",  # path to conda environment
    # ...
)
Environment variables
Workers inherit none of your session's environment variables; they receive
only what you pass in the env argument of new_cluster(). The most
straightforward way is to pass the entire session environment,
env=dict(os.environ). This is also how you can, for example:
- enable imports from local Python (sub)modules by amending the
PYTHONPATHvariable; - enable imports from C++ libraries by amending the
LD_LIBRARY_PATHvariable.
Reading data via XRootD. The environment passed to the workers must contain
X509_USER_PROXY, pointing to your VOMS proxy file on a volume the workers
mount, such as /work/users/<username>/. By default voms-proxy-init writes
the proxy to /tmp, which workers cannot see, so set X509_USER_PROXY before
creating the proxy:
Passing env=dict(os.environ) then carries X509_USER_PROXY to the workers,
together with the session's X509_CERT_DIR, which is a /cvmfs/ path.
Important
For CERN and FNAL users, the dictionary passed to the env argument must
contain the elements "NB_UID" and "NB_GID". This is already satisfied
when you pass env = dict(os.environ), so no further action is needed.
However, if you want to pass a custom environment to the workers, you can add the required elements as follows:
3. Monitoring
Monitoring your Dask jobs is possible in two ways:
- Via the Dask dashboard, which is created for each cluster (see below).
- Via the general Purdue AF monitoring page, in the "Dask Gateway" section of the monitoring dashboard.
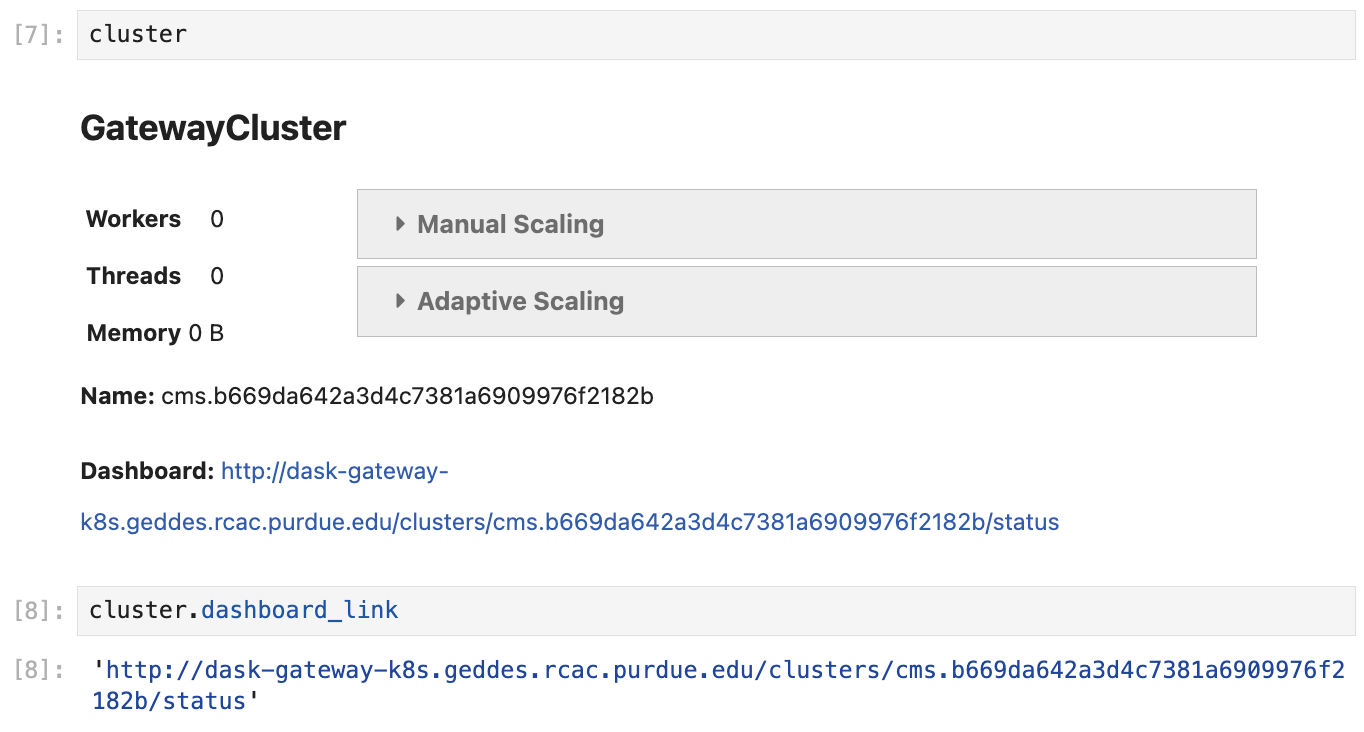
When a cluster is created in a Jupyter Notebook, you can extract the link to the
dashboard either from the Dask Gateway widget, or from cluster.dashboard_link.
To create the widget, simply execute a cell containing a reference to the cluster object, as shown in the screenshot:
4. Cluster discovery and connecting a client
In general, connecting a client to a Gateway cluster is done as follows:
However, this implies that cluster refers to an already existing object. This is
true if the cluster was created in the same notebook, but in most cases we
recommend keeping the cluster separate from the clients.
Below are the different ways to connect a client to a cluster created elsewhere:
This snippet allows you to discover the cluster and connect to it automatically, as long as the cluster exists.
This is the most straightforward method of connecting to a specific cluster.
5. Shutting down clusters
When you are done, shut the cluster down to release the resources for other users:
cluster.shutdown()

# Or shut down a specific cluster by name, even one that is still pending:
# gateway.stop_cluster("17dfaa3c10dc48719f5dd8371893f3e5")

# Or shut down all your clusters:
for cluster_info in gateway.list_clusters():
    gateway.stop_cluster(cluster_info.name)
6. Cluster lifetime and timeouts
new_cluster()waits for the scheduler to start with no time limit.- A cluster that runs no tasks for 1 hour shuts down, whether or not a client is still connected to it.